|
Estimated reading time: 5 minutes.  One of the concerns I hear from people, most often, as to why they are hesitant or nervous about going to the gym for the first time, or the first time back in a very long time, is that they’re worried they don’t know what they’re doing, and it’ll be very obvious to everyone else. Alongside the concern that other people may point that out, or make them feel bad. Firstly, if you are concerned about that I highly recommend trying to find a small to medium box gym, rather than a bigger commercial one. Smaller spaces tend to generate a much better sense of community and comradery, and asshats don’t tend to last/aren’t tolerated. Whereas big chain gyms are harder to police in terms of behaviour, and likely more concerned with making money than fostering a truly positive and healthy community. Secondly, as much as I can’t offer much advice on how to deal with idiots in the gym being rude, apart from just ignoring it, and if it’s of great concern, report it to the floor manager. We can do something about not feeling super confident about looking like we know what we’re doing. Every movement in fitness and sport is built from 7 fundamental movement patterns, and they are:
Once we get some practice and competency with all of these, everything else builds off of them. Not to say you’ll be smashing out front levers on your first day in the gym, but you’ll be a lot more comfortable grabbing a kettlebell and hitting some goblet squats if you’ve already done a bunch of squats at home. Let’s build this at-home workout. First we will go through each movement then at the end I'll give some advice on how to put it all together in one workout. I’ll throw in some regressions and progressions for each as well. Horizontal push: The classic push-up. If you can’t do full pushups (chest to the floor, then locking out to straight arms without bending your body en route) I highly suggest doing some incline ones. You can do these against a wall, on the edge of a table. The aim is to use gradually lower and lower surfaces until you are in the full pushup position on the floor. 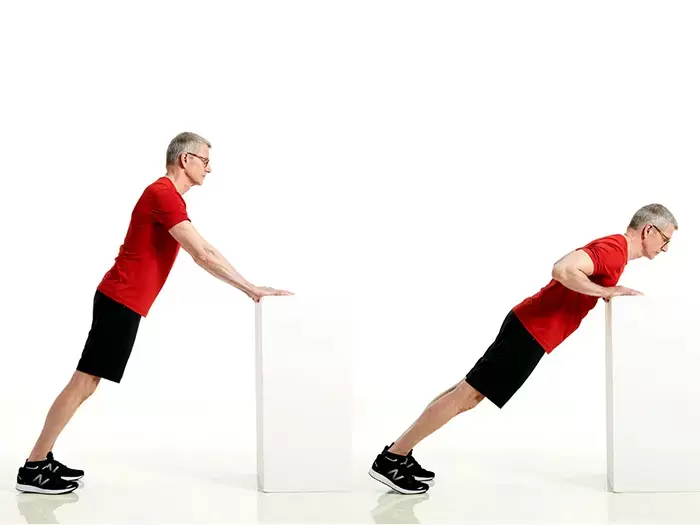 Image credit to silver sneakers Vertical Push: For this one, you’ll need a bag or container that you can fill with things to add some resistance. Once you have your bag, you’re just going to push it overhead while standing upright. We can regress or progress this by changing the weight of the object or bag. Don’t worry too much if there isn’t perfect symmetry in how you press it overhead, we’re just doing the best we can with minimal/no equipment.  Image credit to Men’s Health Horizontal Pull: To pull horizontally at home we have to get a little creative. I recommend the wall or the doorframe pull. Find a doorframe or even better a vertical pole/post that you can hold onto or wrap an old towel around. You’re then going to lean back away from the wall, and then pull yourself towards it. 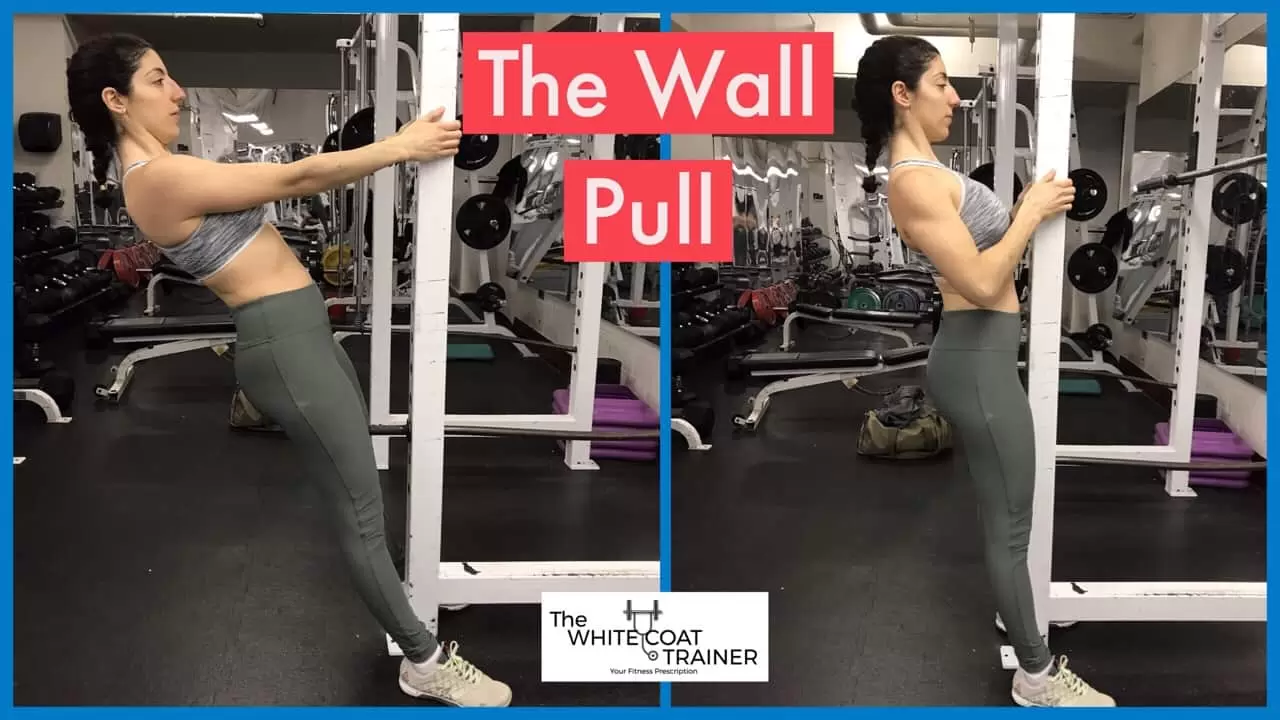 Image credit to The Whitecoat Trainer You can progress this exercise similarly to an incline push-up, by finding ways to lower yourself closer to being parallel to the ground with your weight entirely held by your hands. If you’re feeling frisky you could also look to combine a hinge and a horizontal row for a bag/object bent over a row to fulfil both movement patterns at once! 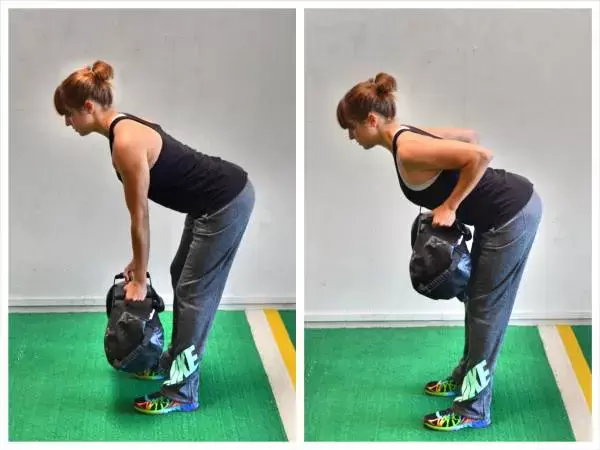 Image credit to Redefining Strength Vertical Pull: This one is very tricky without any equipment. If you have a resistance band this is easy peasy, just tie it to or lob it over something (even shutting one end in the top of a door is good). Then either sit or kneel relative to the band so that you can pull it from overhead down to your chest. If you do not have a band, we can just change what direction vertical is! If we go back to our object/bag and lie down and press it out to full arm’s length. Then we’re going to lower it until it gently touches the ground above our head, then return it to above us, while maintaining straight arms throughout. (Like the photo, but using whatever we have to hand instead of a dumbbell) 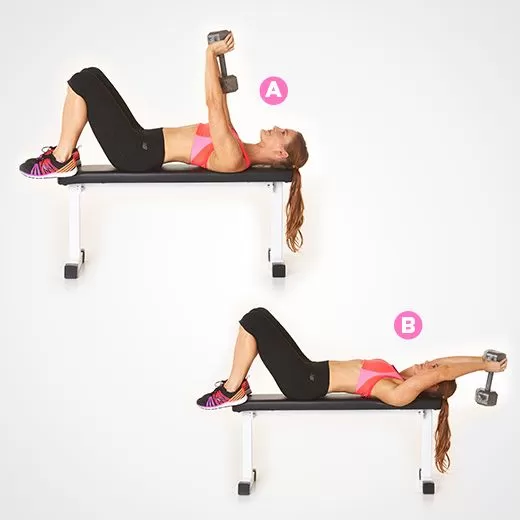 Image credit to Women’s Health Squat: This one is pretty easy equipment-wise, though I am going to recommend finding something sturdy and about 3-6cm in height to put under your heels. A hardback book you aren’t precious about, even scrap wood would work great. Just to give your heels a bit of a lift, which will likely make the exercise a lot comfier. From there it’s just bending the legs and lowering the hips to as low as you can go without letting any part of your foot lift from the floor, and without leaning over too much. To progress the squat we can through one foot behind us up on a chair or a sofa, and turn it into a split squat. For regressing it we can set up close to a door frame, or something sturdy we can hold on to and use that to assist us up and down until it’s comfortable enough to not use hand support. Hinge: The hinge can be a bit challenging for folks. Just because it’s not a pattern we do regularly (unless you golf) the simplest way I get folk to a hinge is to assume that position as if you’re really out of breath, where your hand are on your knees. Then from here we just remove our hands and stay rigid, then pull the hips forward until we’re back standing upright. For progressing this, we can simply add load into our hands in the form of objects or bags. Or we can curl one leg back and go single-leg hinge  Image credit to Men’s Health Rotation: There are a bunch of different ways we can get some rotation in, but one of my favourite starting points for new people is the lying trunk rotation. 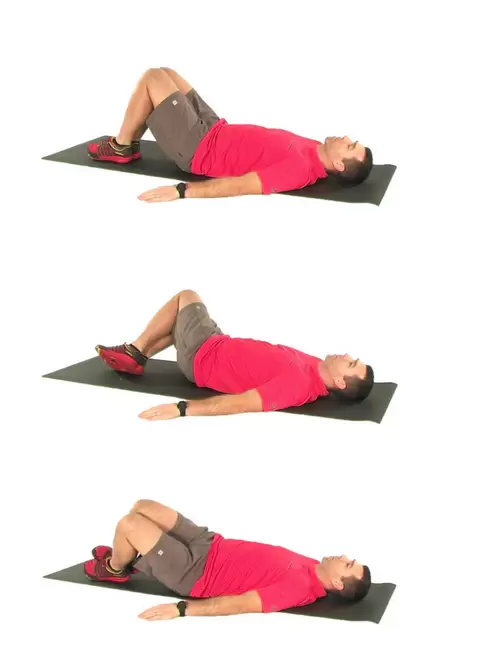 Image credit to My rehab connection You lie on the floor, and bring your feet halfway up towards your hips, then lower your knees to the side together, then control them back into the starting position, then go towards the other side. To progress these we can bring the feet up from the floor so the legs make a set of right angles and the hip and the knee. Then we can progress onto full straight legs, extended towards the ceiling. For the workout itself, start with just 2 sets of 8 repetitions of each movement, in whatever progression/regression works for you best. If you’re fairly sore the next day, don’t repeat the workout until the soreness has dissipated, but aim to build up to going through this daily. Add in 1 extra repetition each time until you get to 15, then on the next workout go back to 8 repetitions but do 3 sets of each instead of 2. Then go through the cycle again at 3 sets of each till you hit 15 reps. Hopefully, you found that helpful! If you’re swithering about going to the gym for the first time, feel free to check us out @atsapproved on all social media, or just give us a call on 07843024606 and have chat!
0 Comments
Leave a Reply. |
Archives
March 2024
Categories
All
|
 RSS Feed
Proudly powered by Weebly